What to do if you smell gas

Reader Question:

I was wondering if you could tell me what I would need to do if I smell gas in my home. I think I know what to do, but would appreciate some expert advice.

Thank you! – Cindy A, Phoenix, AZ

Answer:

Cindy,

Great question! If you smell gas in your home, here are a few simple tips for you to keep in mind. A good idea would be to bookmark this page or print it out so that you will know what to do in the event that you do smell gas in your home.

If you smell gas:

  • Do not use light switches or phones, including cell phones in your home.
  • Leave your home immediately.
  • Call the gas company from a neighbor’s home.

In an emergency the gas can be shut off at the valve at the gas meter.

The typical locations for gas valves in your home are at the:

  • Cooktop
  • Furnace in the attic
  • Furnace in the mechanical room
  • Utility/Laundry Room
  • Water heater
  • Fireplace

The typical locations for gas valves on the exterior of your home are at the:

  • Gas main at the gas meter
  • BBQ
  • Pool/spa
  • Exterior fireplace

Stay safe and don’t take any changes if you smell gas in your home!

Posted in Uncategorized

Stages of Construction: Stage 7

Today continues a series about the stages of construction. Our goal is to help you understand the stages of construction, learn about how we do things and what you can expect during each stage. In this series, we will cover 1 additional stage of construction. To see the previous stages of construction, click here.

In Stage 7, the final coat of stucco is applied to the home and readied for exterior painting, the fences are installed, the final grading is completed, the roof is finished and the exterior of the home is completed then painted. The mirror and shower doors are also installed at this time. Towards the end of this stage is the completion of flatwork and interior & exterior trims; this includes plumbing trims & fixtures, HVAC adjustments and electrical trims & fixtures.

Stucco is applied in two applications, a base coat, sometimes called a brown coat, and a finish or texture coat. The exterior paint is applied after the stucco system has cured.

Stucco is susceptible to cracking due to expansion and contraction. Cracks should be expected during the lifetime of the home due to fluctuating temperatures. This is normal and does not reduce the function of the stucco in any way. Your Limited Warranty does not cover normal hairline cracks in stucco. The white, powdery substance that sometimes accumulates on stucco surfaces is called efflorescence. This is a natural phenomenon and cannot be prevented. Consult your home center or hardware store for commercial products to remove efflorescence.

The plumbing trim includes the water heater, tubs, toilets, shower valves, sinks, faucets and garbage disposal. Installation of these items is scheduled after the tile and countertops are installed. Electrical, HVAC, and low voltage trims can begin as soon as the interior paint is done. All finish trims are completed prior to installation of hardwood or carpet.

Drywall touch-up is scheduled to take place after all finish trims are complete. Drywall damage of some sort is inevitable throughout the course of construction.

Fence footers are installed and the masonry fence block is installed. Please be advised that fence heights will vary depending on your lot and neighboring lot elevation changes.

At the exterior of the home, the final grade will be cut once all of the flatwork is complete, scaffolding is removed, masonry fences installed and the home-site are free of debris.

We hope this helps you understand more about the different stages of construction!

Posted in Uncategorized

How Your Home Works: Toilets

There are many features in your new home that you’ll need to make sure to become familiar with.  From your air conditioning to your smoke detectors there is a lot to learn!  Please take a look at the interior and exterior product information we have gathered to assist you in understanding how you’re new home features work. By learning how these products operate, you will be able to keep them working at their optimum efficiency for the maximum comfort in your new home.

Older toilets held 3-5 gallons of water in the holding tank. Per current code these tanks cannot hold more than 1.6 gallons of water. There are many twists and turns in a normal sewer line and some of these pipes may be 50- 60 feet in length. Much like washing leaves down the gutter, a sufficient amount of water is required to carry the waste for any length. Therefore it may be necessary to “flush twice” or hold the handle down after toilet use to push waste down the sewer pipe.

If you have a spare bath that is rarely used, keep in mind that flushing once will only provide enough water to carry the waste in the line a short distance. If this bathroom is not used again for some time the waste may dry and stick to the pipe causing a back-up and overflow during its next use. It is recommended that you flush toilets and run water down bathroom drains that get little use on a monthly basis to prevent the traps from drying up and emitting sewer gases into your home.

It’s not the most glamorous topic, but we hope that we have helped you understand more about the toilets in your home!

Posted in Uncategorized

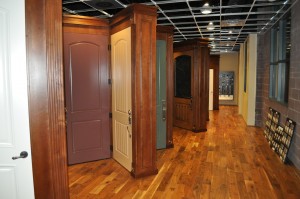
All About Doors!

Below are some helpful things you might want to know about the doors in your home!

Your home comes with a variety of doors that subject to expansion, contraction, and minor movement with changes in heat and humidity and normal settling of your home. The result can be warping and sticking. This is normal and may correct itself as conditions change. You should allow you home to go through at least one dry and one damp season before you make permanent changes.

The hinges and locks on your doors may require lubrication from time to time for proper maintenance and to prevent squeaks. Remove the hinge pin and rub it with a graphite tube or lead pencil and then replace it. We do not recommend using oil because it accumulates dust.

Interior & Exterior Doors:

Look at your doors carefully.  Be advised that security and storm doors will void the warranty on your door and possibly the wall surrounding it. Additionally, glass storm doors add heat which may cause warpage or discoloring of your exterior doors. The operation of the door is affected by humidity levels. Please be advised that your exterior door thresholds need maintenance, keep the finish clean and adjust for weather seal as needed. Interior doors should not warp in excess of ¼ inch, top to bottom. You should be sure to prohibit children from swinging on doors.

Check the finish on your exterior doors several times a year. Doors that receive direct sunlight should be inspected more often. Use touch up paint or varnish as needed. If you notice that the finish is beginning to crack or peel, refinish the door promptly. Unattended, cracking and peeling will progress rapidly and destroy the surface of the door.

Garage Doors

The installation of a garage door opener, unless installed as an available Fulton Homes option, will void any applicable Garage Door Warranty. Garage doors are warranted for proper mechanical operation as installed. The installation of a garage door opener alters the operation of the door, and Fulton Homes cannot be responsible for altered mechanical operation. You should always review and follow the garage door manufacturers cleaning and care recommendations.

Sliding Glass Doors

Sliding glass doors require routine maintenance. Perhaps the most important step is to keep the door tracks free of dirt and debris. The door tracks are soft and can become damaged if they are not kept clean. Use a broom or brush to loosen collected debris. Thoroughly vacuum as a part of your regular cleaning routine.

Avoid using abrasive cleaners as they may scratch the frames. After cleaning, apply paraffin (wax) to the rollers to prevent corrosion. If doors no not slide freely, an oil-free silicone lubricant can be used on the tracks. Do not use any oil-based lubricant on aluminum. Oil attracts dust and dirt, which become embedded in the lubricant and may damage the aluminum.

Sliding glass door frames have small weep holes at the bottom to permit water to drain from the track. Keep the weep holes open and free of debris. Avoid flooding door frame tacks. Excessive water can overflow the track and back up into your home.

During high winds, air will penetrate your doors, especially through the weep holes. This is normal. The weep holes are necessary for proper ventilation and you should keep them clear at all times.

A few simple maintenance tasks will ensure your windows provide years of trouble-free service.

Tip: Do not apply window-tinting film materials to double-glazed sliding glass doors. The use of these materials can cause a buildup of heat between the panes of glass. The excessive heat will destroy the seals and permit water condensation to form between the panes.

Aluminum foil also causes a heat build up between windowpanes and should not be used.

Adding window tinting or aluminum foil to your sliding glass doors will void the warranty on your sliding glass doors.

The use of self closing devices on sliding glass doors will also void their warranty.

Like other door types, you should always review and follow the sliding glass door manufacturers cleaning and care recommendations.

If you have any other questions about doors, please leave us a comment!

Posted in Uncategorized

Stages of Construction: Stage 6

Today continues a series about the stages of construction. Our goal is to help you understand the stages of construction, learn about how we do things and what you can expect during each stage. In this series, we will cover 2 additional stages of construction. To see the previous stages of construction, click here.

In Stage 6, Tile is installed on the floors, countertops and bath areas. Granite and marble tops are also installed. Additionally, masonry work is completed where specified.

The tile and countertops are installed after the cabinets have been installed. If you have made cultured marble or granite selections, they are measured after cabinets are installed. Typically these tops and surrounds will be installed after they are measured. The finished edges of some marble and granite tiles may need to be routed and polished. This is an expensive and time-consuming process. Marble and granite selections, as well as their availability, will be confirmed at the Design Center Meeting.

The fabrications of granite slab countertops are done off-site and may take several weeks from the measure date to install. The slabs are cut to size, polished and edges are routed before they leave the shop. Sink and cook-top cut-outs are done on-site. Back-splashes and seams are cut and fitted on-site as well. The seams in granite slab countertops may vary in placement from that of a model home or your neighbor’s home. This is due to the size of the slabs you may have selected and the natural stability of the slab.

Please note: granite slabs are selected to best match those samples seen and are a natural material and will never match the color, grain and texture samples seen or those in the model or existing homes.

We hope this helps you understand more about the stages of construction!

Posted in Uncategorized

Fulton Homes Launches Ira A. Fulton Aquatics Center & Legacy Traditional School


State-of-the-Art Facility & Arizona Highly Performing Charter School Elevate Ironwood Crossing into One of the Premier Communities in the East Valley

Fulton Homes will open the doors on its 2.4 million dollar Ira A. Fulton Aquatics Center on Friday, June 18. Located in the Ironwood Crossing Community at Westbrooke Road and Barnes Parkway, in Queen Creek, the aquatics center features a 6,837 square-foot pool available to Ironwood Crossing residents. In August, Fulton Homes will also be welcoming Legacy Traditional School, an Arizona Highly Performing charter school to the Ironwood Crossing Community. Over 540 children have already been registered for the new Legacy facility, which will house over 700 students in its first phase with 26 classrooms, a gym, stage and kitchen, as well as a full complement of playgrounds and sports fields.

“We’re excited to offer this spectacular amenity and outstanding school to the residents of Ironwood Crossing,” said Fulton Homes CEO Douglas Fulton. “Not only are ‘we proud to build homes that you’re proud to own,’ but we’re also in the final stages of building out one of the most beautiful and complete communities in the east valley.”

The aquatics center features two main sections, one with three tiled 79-foot lap lanes, and the other for smaller children that includes three interactive water features. The outdoor facility boasts 12,524 square-feet of pool decking for lounging and sunbathing. A 1,257 square foot splash pad graces the area comprised of “tot turf” for added comfort and safety. 16 interactive ground-spray jets help to keep residents cool, along with a “Poly Palm” water tree and interactive waterfall.

The new aquatics center also has open park areas, a 25-foot umbrella, a community Ramada for family get-togethers, and restroom facilities. The children’s area is separate from the main pool area and fenced off so that water safety is realized. The main pool area has separate restroom facilities, and a giant sail shade structure covers half of the gigantic pool to protect residents from the sun. There are also four additional 25-foot umbrellas for ample shade.

“We’re proud to open this phenomenal aquatics center and this much needed community meeting place will be a great addition to the Ironwood Crossing Community,” remarked Dennis Webb, Vice President of Operations for Fulton Homes. “This is the only master planned community in the east valley with an aquatics center of this caliber and Ironwood Crossing is truly becoming a haven for families and couples alike looking to settle in a community that caters to their needs.”

The Legacy Traditional School is planned as a back-to-basics institution that uses Spalding Language Arts and Saxon Math as its core curriculum. In addition to the core subjects or reading, writing, and math, Legacy will also provide students a well-rounded education in Science, Social Studies, PE, Music, Art and Computers.

Legacy will initially serve grades Kindergarten through 8th grade. The campus is designed to accommodate future buildings and eventually the school hopes to serve Kindergarten through 12th grade at its Ironwood Crossing location. Parents interested in the school should visit http://www.legacytraditional.org or call (520) 423-9999.

“This school represents our future here in the east valley,” notes Fulton. “We remain committed to the future vitality of the housing market in Arizona and our vision is to make Ironwood Crossing the premiere community for families in the southeast valley.” Fulton added.

Paradise at Ironwood Crossing was recognized in 2009 by Builder Magazine as being one of the Top 10 Best Selling Communities in America. In addition to the aquatics center and charter school, designs are also on the books for a new church in the Ironwood Community.

Posted in Uncategorized

Solutions to Common Window Problems

Window issues can be frustrating! Below are some common problems and solutions that you might run across with your windows. We hope these solutions can help you.

Problem Likely Cause Solution
Window binds or is difficult to open. Broken window balancer. Replace balancer.
Window will not stay open. Weak window balancer. Replace balancer or adjust tension rod.
Window will not slide up or down. Tension rod jammed. Call Fulton Homes for inspection.
Window will not lock properly. Window not squares. Call Fulton Homes for inspection.
Condensation between insulated glass surfaces. Insulated glass seal broken. Replace glass panel or sash.
Condensation on inside surface of window. High humidity inside home. Reduce humidity with exhaust fans and dehumidifier.
Posted in Uncategorized

Stages of Construction: Stage 5

Today continues a series about the stages of construction. Our goal is to help you understand the stages of construction, learn about how we do things and what you can expect during each stage. In this series, we will cover 3 additional stages of construction. To see the previous stages of construction, click here.

In Stage 5, the interior doors and trim are installed. All interior painting and staining is completed. Once the painting is completed, the cabinets are installed in the kitchen and bathrooms. Marble tubs and shower pans are also installed at this time. A written notice will be sent by Fulton Homes giving your orientation and closing/key release dates, as well as other valuable information pertaining to the closing process.

The interior trim package includes wall caps, interior doors & casings, window sill options, baseboards, closet shelves & poles, plus any crown, or decorative molding. Many of the surface materials used in the interior trim are manufactured wood products.

The interior trim is then prepped for paint. Trim is caulked to the drywall and nail holes are filled. Ceilings “other than bathrooms and laundry rooms” are painted with “flat” paint. Walls are painted with semi gloss eggshell paint. Wood/Masonite interior doors, door casings, baseboards, paint grade wood caps, and paint grade wood stair railing are painted with lacquer acrylic gloss enamel.

Stain grade handrails are stained per the customer’s selection. The stain on handrails is never guaranteed to match the cabinet color due to the type and natural characteristics of the wood used on handrails. All natural woods accept stain differently. Please be advised that cabinet stain color and darkness will not always be an exact match to what you see in the models or at the design center. This is also due to the type and natural characteristics of wood used on cabinets.

Cabinets are delivered when painting is completed.

This sums up the 5th stage of construction. Stay tuned for more stages and information!

Posted in Uncategorized

Stages of Construction: Stage 4

Today continues a series about the stages of construction. Our goal is to help you understand the stages of construction, learn about how we do things and what you can expect during each stage. In this series, we will cover 4 additional stages of construction. To see the previous stages of construction, click here.

During Stage 4, insulation is installed throughout the home and the drywall is hung, taped and textured. Ceilings and walls are then sanded in preparation for paint. To avoid knocking the stucco off of the exterior walls, drywall is hung before any stucco is applied to the exterior. The stucco brown coat is applied as soon as the drywall is hung.

The insulation is installed after passing the frame inspection. Typically, insulation batts are used in walls, while ceiling or attic insulation is blown in after the dry-wall is hung. Optional blow-in wall insulation is installed at this time.  Drywall, or sheet rock, is hung after the insulation passes inspection by the Fulton Homes Project Manager.

The stucco lathing is inspected by the local municipality building & safety inspector and the Fulton Homes Project Manager. The stucco brown coat is then applied and allowed to cure.

A router is used to trim drywall at openings for windows and doors. It is not uncommon to slip and over-cut these areas from time to time. Minor cuts in the drywall, if they occur will be repaired as needed.

Once the drywall is hung, a sheetrock nailing inspection is required by the local municipality building & safety inspector. Next, the gas piping system is pressurized and inspected.

Having passed the nail inspection, the dry-wall seams are taped. A paper tape is embedded in dry-wall taping compound to seal these joints and reduce cracking.  Once the tape joints are dry, they are topped with a similar compound.  This second coat is used to level off these joints and fill-in any voids or nail holes.  A skim coat is then applied as need prior to the texture-coat. The texture coat is manually applied as a skip trowel with a large trowel blade. Each coat must dry thoroughly before the next coat is applied. Wet or cold weather may add several days to this process. Once the drywall is textured, it must dry and then be lightly sanded prior to trim carpentry and painting. Please keep in mind that the texture coat is a custom hand applied texture and will typically show inconsistent patterns. This is normal and considered part of the custom application.

We hopes this helps you understand a little more about the stages of construction!

Posted in Uncategorized

Fulton Cares – Moen Bath Fixtures

As part of giving back to the community, Fulton Homes has created a Fulton Cares section which highlights the many ways in which we are building energy efficient homes, and helping the environment at the same time.

At Fulton Homes, we use energy efficient building processes that make the homes we build today far more efficient than those of just 3-4 years ago.    The homes built today are far more efficient and cost less to operate than used homes.  Below is one of  the examples showing how Fulton Cares.

Moen Addresses Enviromental Concerns With New Water Saving Showerhead

  • Moen’s new Water Saving showerheads have a flow of 1.75 gallons per minute, offering a 30 percent water savings from the industry-standard 2.5 gallons per minute showerheads. Not only is this savings significant in reducing water consumption, but it also reduces energy costs as less hot water is used.
  • Inclusion of the new showerhead allows builders to receive maximum points for water reduction under the LEED (Leadership in Energy and Environmental Design) rating system.
  • The enhanced spray uses less water, conserving precious resources, while providing an enjoyable and satisfying shower experience.
  • Unlike some low-flow showerheads that simply restrict the water flow, Moen’s Water Saving showerhead features an optimized spray pattern to preserve the powerful stream that consumers are accustomed to from full-flow showerheads.
  • To meet the design needs of savvy consumers, hotel designers or multi-family property managers, Moen’s new Water Saving showerheads are available in popular finishes such as, Chrome, LifeShine® Brushed Nickel and Oil Rubbed Bronze to coordinate with bathroom faucets and accessories.
Posted in Uncategorized