Making Your Home Lovely: Part I

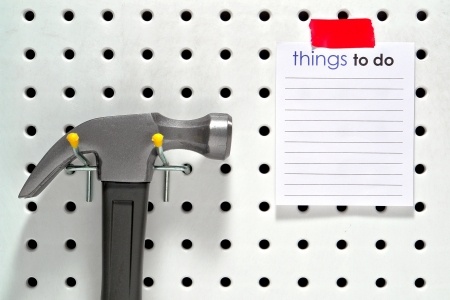
Would you like to be one of those people who never minds if neighbors or friends stop by because your home always looks fabulous? You can make that happen with just a few changes to your routine. Here are some suggestions to creating a fresh and inviting home free of clutter and dirt. Let’s start with clutter.

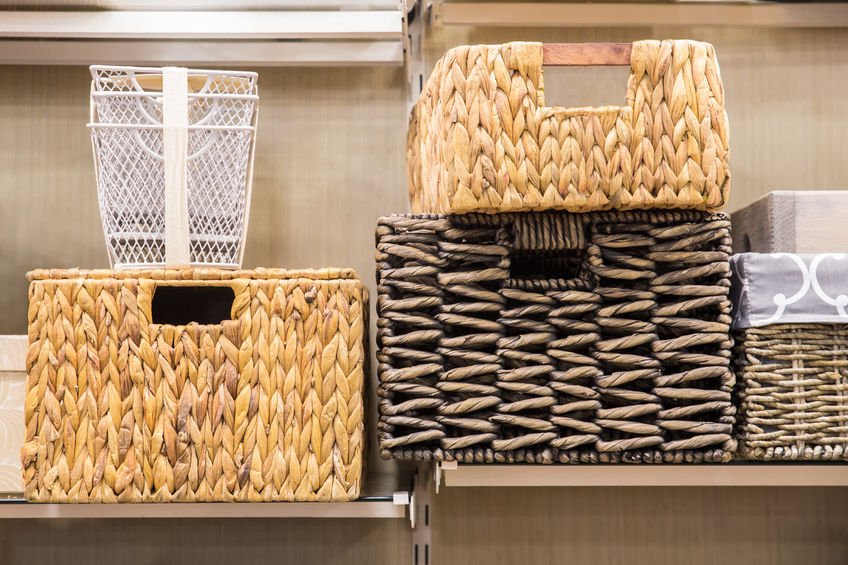
A place for everything: Now, getting here is not easy or fast. It’s up to you to make a commitment to organizing and creating systems that everyone in your family can handle. You might want to start by thinking of your home as a retail store. For example, put all of the office/school supplies in one place, all bed linens in another. Also, invest in a little label maker. You can then label the inside of every drawer and cupboard with a description of its contents, and even label some items – such as the scissors – with their category so it’s easy to remember where to put them back after using them.

Buy and use a put-away basket: Every evening walk through your house and put everything that’s out of place in the basket. Then walk through a second time and put it all where it belongs. This is also a great project to delegate to your kids. You can even charge a fine – a nickel for anything that any family member forgets to put back in its place. Save the money for a family dinner out in the future.

Assign standard chores: These can include everyone – you, kids and spouse – making their own beds, rinsing and putting their own dishes in the dishwasher, choosing their clothes for school the next day, and whatever else you want to see happen daily. Once these habits develop your responsibilities will diminish. This also provides a good discipline for their future lives. 

Understand that none of these steps will happen overnight. This is a work in process and you will always have to make adjustments over time. But the best time to start is now. And maybe every week you’ll see signs of progress.

Be sure to come back tomorrow for Part II!

7 Ways To Conceal Unsightly Things

If you’re a perfectionist we’re betting that you are going to LOVE these ideas. It can be such a frustration to create a beautiful, well designed room only to have it interrupted by unsightly features. Some things just can’t be avoided, such as a thermostat or utility meter, but there are creative ways to conceal them. Are you ready to be done with grumbling at the modem every time you walk by it? Read on! 

  1. Utility meter or A/C Unit outside – Cover (and easily uncover) using free standing, accordion shutter doors.
  2. Computer printer – Use a dresser or entertainment unit with a drawer deep enough to fit the printer. Detach the front panel and reattach it with hinge so you can open it as needed when using the printer.
  3. Computer modem – Hollow out a hardback book and simply slip the modem inside, display with the book spine facing outward.
  4. If your TV is mounted on the wall hide the dangling cords by installing a hollow shelf made crown molding.
  5. On a wall that has a thermostat create a collage with various sized frames. The thermostat will blend in rather than being starkly apparent.
  6. Hide a power strip using a photo storage box. Remove the back wall of the box and slide the power strip in.
  7. If you can’t or don’t want to use a bed skirt, simply cover the unsightly box spring using fabric and a staple gun. 

Do you have ideas to hide unsightly household items? Share your ideas in the comments!

Have You Organized Your Refrigerator?

Still have last month leftovers stocked on your refrigerator shelves? The refrigerator should be cleaned out and sanitized frequently for health reasons. If you’re ready to take on the daunting task of organizing and cleaning your refrigerator, we’re going to show you how you can do so effectively. It’s time to throw out expired condiments, old food and clean the gunk from the corners.

How To Clean Out the Refrigerator

Perhaps the easiest way to clean out the fridge is to empty out the contents. You can do this section by section, or all at once. Setting everything outside the refrigerator allows you to determine what needs to be thrown away and what food items can be kept. Of course items that need to be discarded should be thrown in a trash bag, while the others can be kept to the side so that you can load them back into the fridge.

More than likely, the interior of the fridge is less than pristine. Before you load the contents back in you should take a wet, soapy cloth and wipe off the crumbs and food remnants that are stuck on the shelves. For areas with gunk that’s tough to remove you can use a solution of vinegar of water. Make sure you dry wipe the fridge dry. Don’t forget the drawers and the fridge doors.

Arrange The Refrigerator Like A Professional

When loading the refrigerator back after thoroughly cleaning it you should organize it like the professionals do. Restaurants organize their refrigerators based on food safety. Professional kitchens organize food in the fridge based on the temperature it requires to be cooked. Prepared foods and leftovers that don’t require a high cooking temperature are usually stored on the top shelf in the fridge. Chicken, uncooked meats, and other raw foods are placed on the bottom shelf. When foods are organized this way you won’t have to worry about cross-contamination.

Here’s a guide you can follow for loading the refrigerator:


Door
– The door is the warmest section of the refrigerator. Therefore, you should store condiments in this area.
Drawers – The drawers are meant to hold produce which is your fruits and vegetables.
Upper Shelves – The upper shelves should be used to store ready-made foods like yogurt, cheese, leftovers, and drinks.
Lower shelves – Raw foods

Thanks for reading and hopefully this helps you with the task of cleaning out your refrigerator, and makes it a little easier!

Organizing an Overpacked Home

Is your home overflowing with unnecessary items? Do you feel too overwhelmed to even begin working on your house? Are you tired of not knowing where to put all of your things? If you answered “absolutely” to any of these questions above, know you’re not alone and we would love to help you. Ideally, you will find yourself reorganizing your home at least once a year. Every year we see ourselves buying more miscellaneous items and belongings to fill our homes to their brink. To help you achieve maximum organization and function, we have created a guide for organizing an overpacked home. Let’s take a look! 

How to Organize an Overpacked Home:

Search for Storage. Storing your items is the only way you will get them out of sight and out of mind. Decorative pieces can be left out, but things that do not serve a daily purpose should be stored away.

Clean out Your Cabinets, Closets, and Drawers. You can find a lot of unnecessary items tucked away in your cupboards. A best practice in organizing is clearing out your built-in storage containers before adding more items. After you have cleaned out your available storage, take advantage of these spaces that are provided by your house. You can then begin to put things back into your drawers and closets.

Buy Storage Containers. There is an array of home furnishing items that add style while providing storage to your home. Pieces that optimize storage and style are:

  • Bookcases
  • Benches
  • Baskets/Bins
  • Coffee Tables
  • Desks
  • Dressers
  • Vanities

Organize in Style. Organizing your home does not necessarily mean marking each item with a label and placing it into a clear container. Organizing your home can allow you to add more to spaces than you previously had. Things to consider:

  • Home offices hold a lot of storage potential. Having an office in your house will also help keep your home organized. You really only need a desk to make a space your home office. Once you have a desk, consider everything you have the potential to store in it:
      • Mail and letters
      • Notebooks
      • Office supplies (pens, pencils, paper, scissors, tape, etc.)
      • Books
      • Computer/Laptop
  • Pets tend to have a lot of their own belongings. Make a section in your home designated for their items. You can install a shelf or a cabinet to hold all their belongings. Storing the items up high is mutually beneficial; it guarantees your pet cannot get into something they should not, and you can decorate the piece to your liking.
  • Pet items can easily be stored in places like the garage or basement to help you maximize the use of your high-traffic areas.
  • Kids’ toys can be everywhere sometimes. Chests/bins are a stylish piece of furniture that can store your little one’s toys and activities.

Ultimately, the key to organization is cleaning. You must clean out your home before you can begin to organize it. Now is the perfect time to get started on cleaning out your house. Keep in mind, you do not need to throw everything away! Let us know how your organizing project turn out!

Operation Organization in Ten Minutes

When we think of undergoing an organization project in our home, we think of it as a daunting, long task that will take up a lot of our day. While organizing areas in our house, the mere thought of beginning these tasks can influence us to procrastinate. However, what if you could organize areas in your home in only ten minutes We all have ten minutes in our day to spare. While this may seem too good to be true, you would be amazed at how much you are able to accomplish in your home in just ten minutes. Now, you will need to stay focused and keep moving, but with our Ten Minute checklist, you can quickly get your rooms reorganized. Here is our Ten Minute Checklist to help you reorganize areas in your own home:

Break Larger Projects into Smaller Tasks

Some tasks can be very overwhelming at first. Maybe you want to organize your bathroom, clean a closet, or declutter your garage. These larger tasks can take time. Try to look at areas then break them into smaller projects. For example, maybe you have been procrastinating organizing your bathroom for some time. You have clutter drawers, unfolded towels, and toiletries that have no designated homes. Instead of tackling everything at once and deep cleaning the room, try to find a more obtainable task. Tell yourself you are going to organize one drawer every day. Using this simple tactic is a great way to start making some serious headway on big projects.

Declutter

When you find the task that you are going to accomplish, start by decluttering. A cluttered drawer or closet can visually be overwhelming. Pull everything out of the space you are working on cleaning. By spreading the mess, you can quickly identify what goes where. Since clutter is one of the main visual intimidations that prevent us from starting a task, you can begin by decluttering the area that you are more likely to accomplish.

Trash/Donate

Once everything is pulled out, decide what trash is and what will stay. By eliminating items and belongings that were once cluttering the area, you will be able to put the area back together into a more organized look. Decide if any things are no longer of value to you. Maybe they are still valuable and worth donating to others. Some items may just blatantly be in the wrong spot in your home.

Organize

Lastly, with your time remaining, put everything back into your drawer. Using bins or baskets is an easy way to organize belongings. Return everything to the original spot in a more focused and organized manner. You will be surprised what some focus and ten minutes can accomplish!

Do you have areas in your home that demand attention Try this organization checklist to help get you started. You will be amazed at what you are able to get done in ten minutes. For more great tips, visit us at Fulton Homes.

Design Center: Pot filler

4 Pot Filler Design Center 016
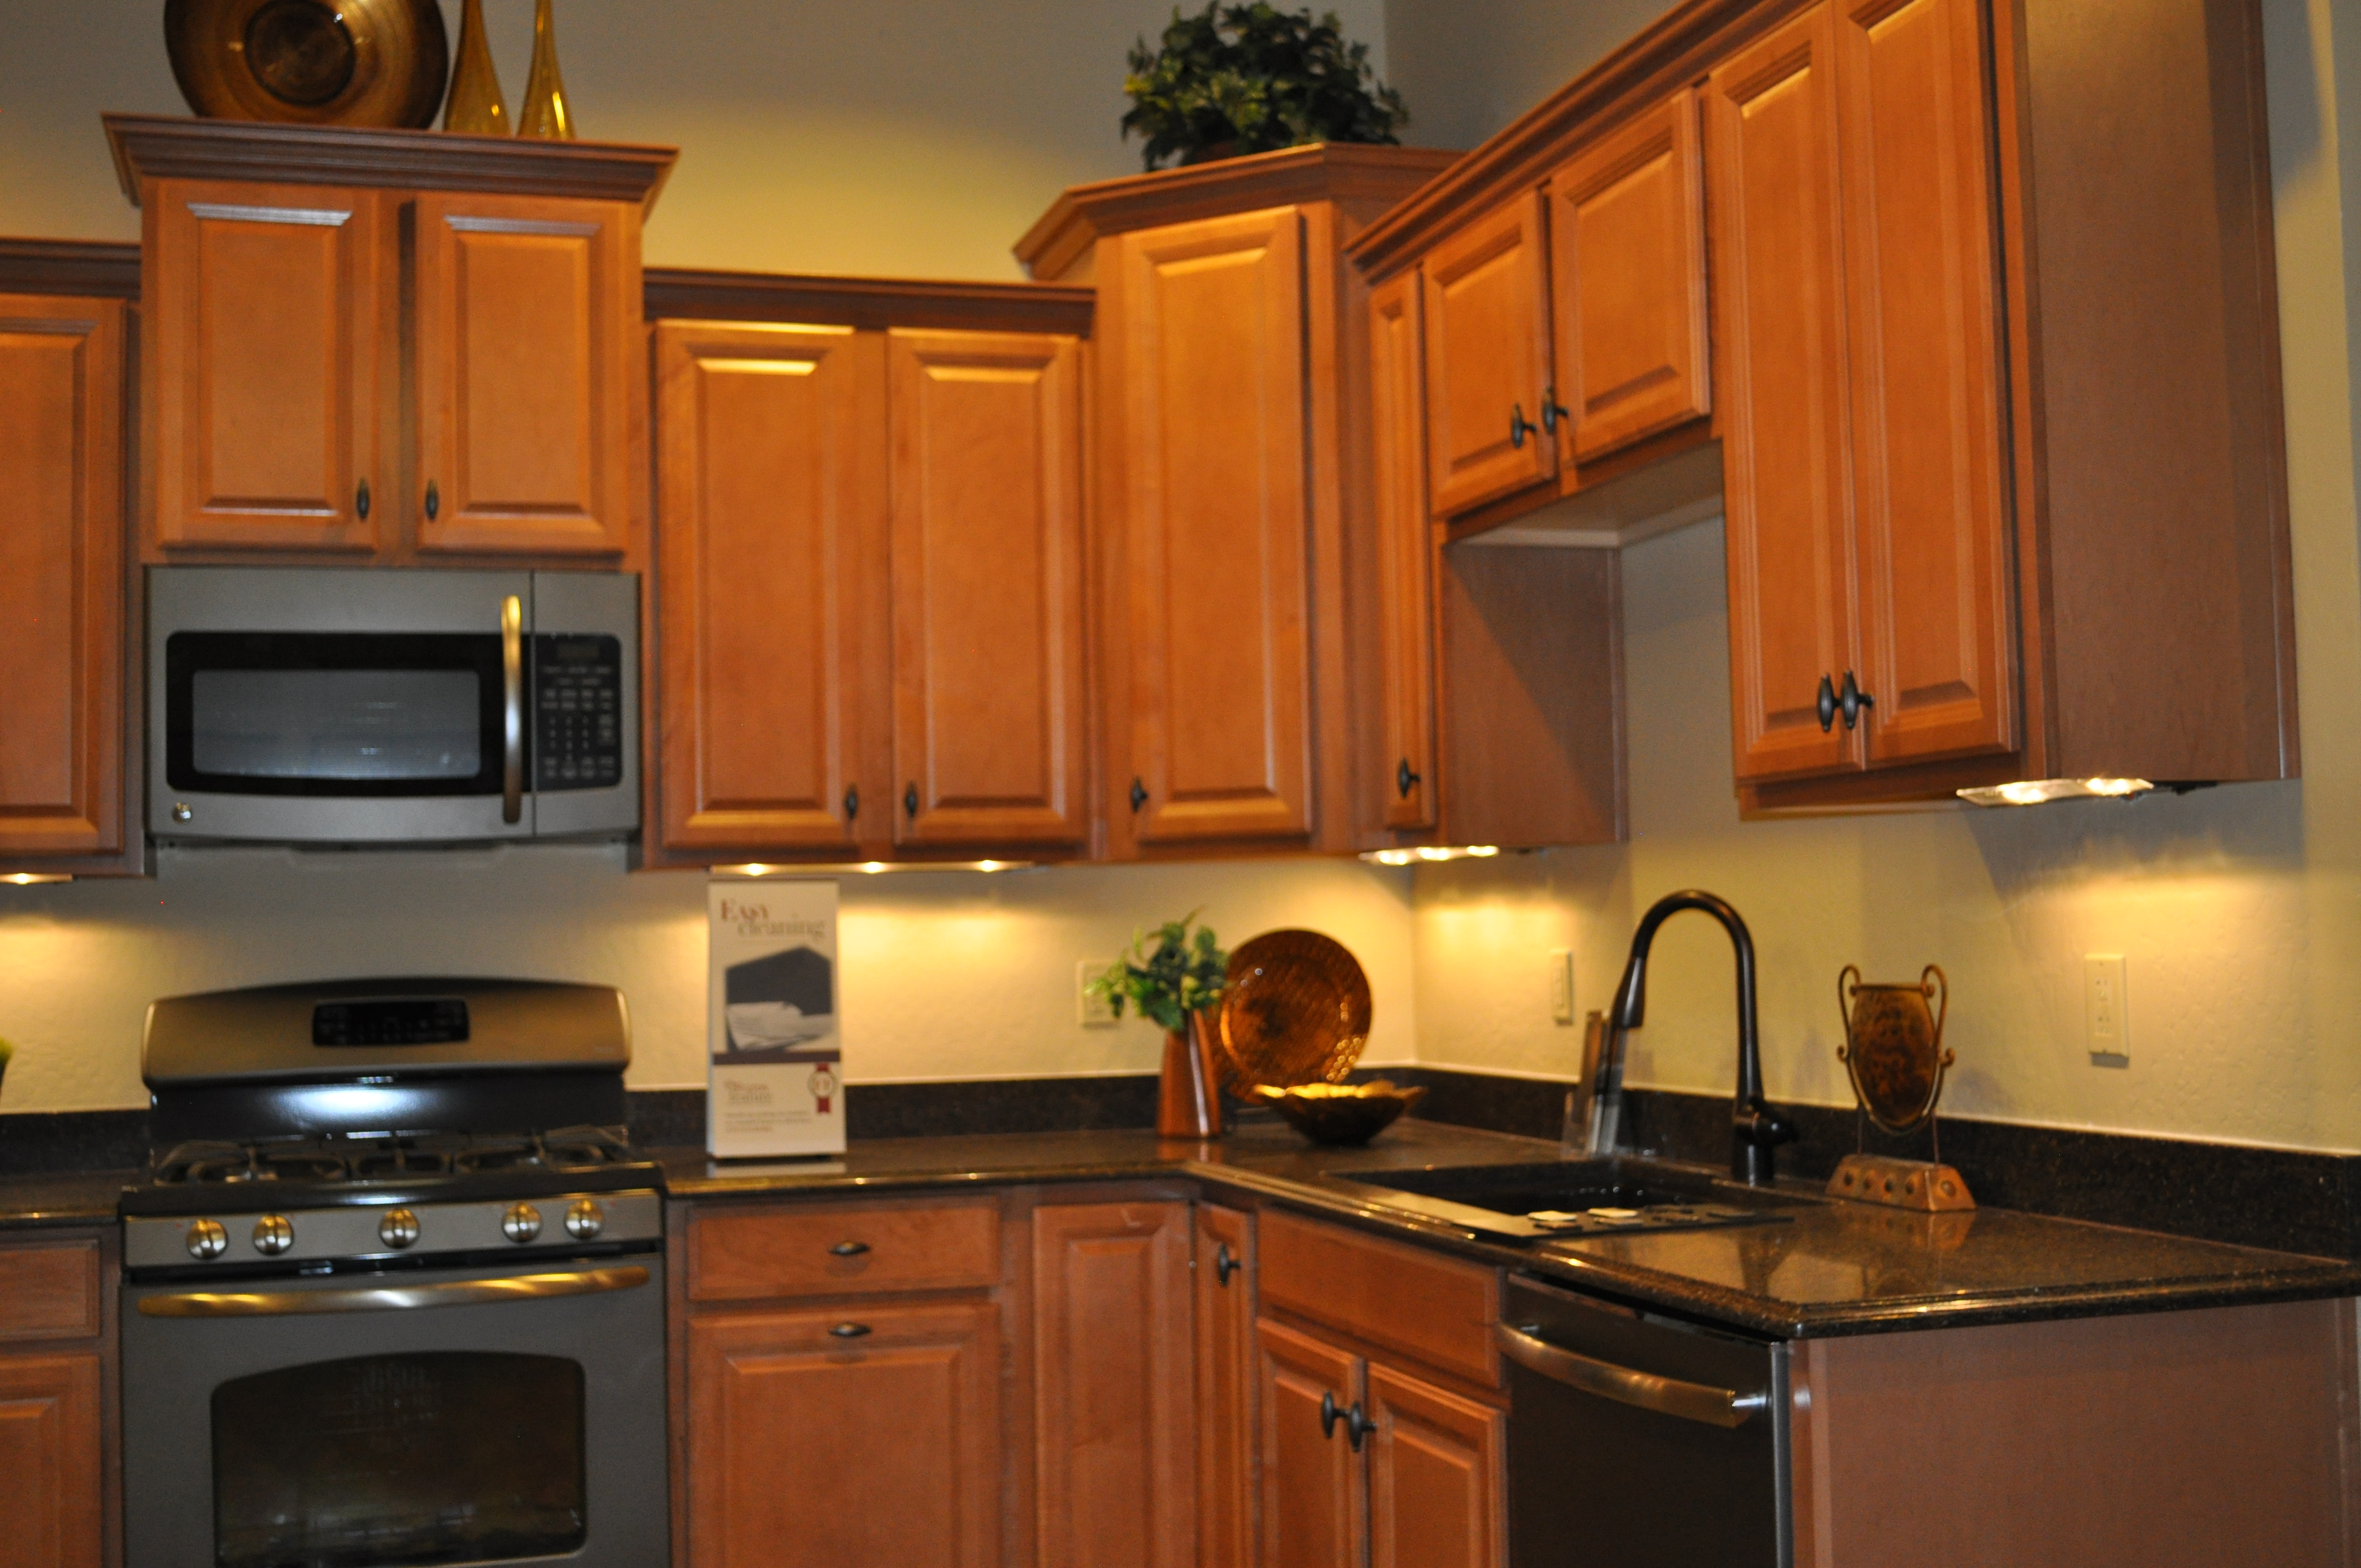
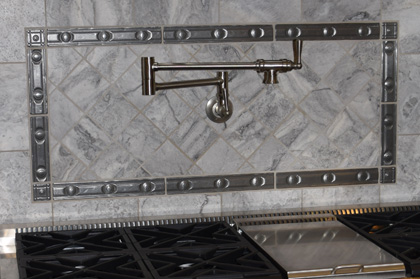
Would you appreciate never having to haul a heavy pot of water between your sink and range again? If you enjoy pastas, soups and stews, you may find that a pot filler reduces back strain, prep time and makes meal preparation that much easier.

Even your largest pasta pot will fit under this faucet. Its hinged design means that you can push it out of the way when you don’t need it and grab it easily when you do. Whether you use it to fill large pots or just add water to your saute pan to slow down the cooking, this pot filler will save steps.

By adding metallic tiles to the backsplash, this pot filler is well integrated into the kitchen’s design. The structure allows you to pour water as needed for any pot or pan on your stove.

Are you not sure how much you would use this? Try an experiment. Put a post-it note above your stove and jot a check for every time you fill a pot, pan or kettle with water from the sink before you bring it to your range. You may be surprised at how often you could save yourself the steps if you could access water right at your stove. Now, multiply that by 52 – and don’t forget to factor in holidays, parties and family gatherings which will only add to the sink-to-stove trips. And don’t forget that all those trips include hauling heavy pots filled with water around!

Well, is it worth it for you? A pot filler may be one of your smartest kitchen features!

Home Tech Center Keeps Life Organized

Tech20Center20DSC_0263

Fulton Homes Starlight Model

As we become more and more connected to the outside world through numerous devices, our homes need to make adjustments to fill the requirements of today’s lifestyle.

In many homes, the opportunity to charge phones, tablets and laptops requires a shuffling of electrical outlets while ensuring that the morning rush doesn’t lead to leaving the essential communication tools at home.

At the same time, managing a home and family becomes easier if the home itself provides support for coordinating everyone’s briefcases, homework, and electronics.

Take a look at the Fulton Homes solution – a tech center that provides space to charge electronics, room for book bags and notebooks, and a center for other home administrative tasks.

All this space needs is a laptop to support online bill paying, homework Internet research, space for books and school projects, and a staging center for getting everyone out the door in the morning with a minimum of frustration and fewer searches for lost keys or other essentials.

Without a center like this, the kitchen often becomes the default center for the odds and ends of our to-and-fro lives. Mixing papers and books with breakfast can lead to spills and too many items unthinkingly moved out of sight in the energy of getting dinner or breakfast ready. With this tech-rich drop center, everyone can have the space to keep track of their own materials.

Consider adding an in-basket for every family member so that mail, homework assignments and other personal papers are contained in one place. Add a family calendar on the wall so everyone knows where they are supposed to be on any given day. Or make sure that everyone has their own drawer and files so that things can stay organized thanks to an organized space to work with in the home.

A Fresh Start on Organizing your Home: The Kitchen II

The large island with schoolhouse pendant lights, rich dark cabinets and light granite countertops combine to make this Fulton Design Center kitchen memorable.

The large island with schoolhouse pendant lights, rich dark cabinets and light granite countertops combine to make this Fulton Design Center kitchen memorable.

If you’re ready to organize your kitchen but are hesitant to engage in an all-out full-day redo, you can take baby steps that will leave you with a fully organized and functional kitchen. The following can be accomplished over a number of days or even weeks.

  • In a corner of your dining area or somewhere near the kitchen but still out of your way, place a large wastebasket and a box. These will hold your discards and giveaways.
  • Begin with one cabinet or drawer. Take everything out, wipe it down and put in new shelf paper if you desire.
  • Only put back those things that you want to keep there in the future.
  • Take a look at what’s left and discard or give away whatever you can.
  • Put the remainder on a corner of your countertop. If you want, you can stop here until the next day.
  • Choose your next cabinet based on what remains on your countertop. Which one is the logical place to put the bulk of what you have there?
  • Empty that cabinet and continue as before, wiping the shelves down and replacing what you feel belongs there, including those things that are currently waiting for their new home on your counter.
  • As you continue around the kitchen, are there certain groups of items that never seem to have a place? Perhaps you need to designate a specific cabinet or space for them. If they aren’t essential for your kitchen, consider another location such as the laundry room or garage.
  • Once you finish, do you still have leftover items on your counter? It’s time to decide whether you really want to keep those things or if they go in the giveaway box or boxes.
  • As you work, keep thinking of your specific needs rather than trying to follow arbitrary rules. For example, the bookshelves on the end of the island may be designed for cookbooks, but they may work better for your family as cubbies for the kids to put their homework and books for school the next day.

Yes, this process leaves your kitchen a bit up in the air for a while, but once you’re done you will have a space that matches your functional needs, with nothing extra cluttering up the room. So it’s worth it to bite the bullet and deal with the disorganization for a few days for the benefits at the end – a kitchen that works!

A Fresh Start on Organizing Your Home: The Kitchen

One of the kitchens on display at the Fulton Design Center

One of the kitchens on display at the Fulton Design Center

At first glance, getting your kitchen organized may seem like a daunting task. Chances are that when you moved in your goal was simply to get unpacked and able to make meals. Even if you had some plan of organization at the time, actually using your kitchen can help you discover that some items need to be rearranged. You have at least two ways to tackle your kitchen. See which one appeals to you.

Complete do-over. This is a full-day project, preferably with at least one other person to help as well. To make this work, try the following steps:

  • Clear off counters, placing any decorative items in another room for the day.
  • Have a bag ready for garbage and a box for giveaways.
  • Empty every shelf onto the counters and dining table.
  • Dispose of anything you don’t want or use in either the discard bag or giveaway box.
  • Wipe down counters and add or change shelf paper if desired.
  • Place the “sure things,” those items you already have a good place for, in their cupboards.
  • Thinking of function and utility, rearrange the other cabinets & drawers.
  • Determine if you need baskets or other containers for some items, and measure the space to know the size. Make a list for an upcoming shopping trip.
  • Measure your drawers for appropriate drawer dividers – these help keep drawers in shape once organized.
  • Compare the space left to the items left. Can you make them work? If not, consider more discards.
  • Put your kitchen counter accessories back, or not. Analyze what you actually want back in your kitchen.
  • Celebrate by going out to eat – you don’t want to mess up your newly-organized kitchen right away!

In our next organizing blog, look for advice on the second suggested method of kitchen organization. It takes longer but is less overwhelming.

Set Resolutions for your Home in the New Year

10254941_SWhen you consider resolutions for the New Year, how about making some for your home?

Most people have things that they want to fix, change or add to their homes, so you could make 2014 the year that some of those dreams turn into reality. Here are a few examples.

Small maintenance tasks: A dripping faucet, weeds in the yard or even light bulbs that are burned out are easy to ignore but can be a constant irritant. Plan a day to fix those little frustrations that always seem to be postponed. Getting those done will make your home more relaxing.

Safety checks: Have you replaced the batteries in your smoke alarms? Do you have a fire extinguisher in your kitchen? How about a complete first-aid kit? Are some rugs or cords tripping hazards? It won’t take long to make sure your home is as safe as you can make it. You can find tips for keeping your home hazard free on the Internet.

Organization: Don’t feel obliged to get the entire house whipped into shape. Instead focus on a few areas that are particularly challenging. Maybe you empty and sort-out your junk drawer, or get your gardening tools organized in the garage. It could be time to dispose of all of those old cleansers and unsatisfactory cleaning products under the sink that you never use. Every place you make more functional will add to your pleasure in your home.

Special touches: Have you wanted to add scented candles to your guest bathroom? Maybe one wall is begging for some art. Pick out one or two areas that feel unfinished in your home and resolve to add those items that will make it look and feel the way you want.

If you include your home in your resolutions for 2014, your home will see improvement and you will find yourself happier living there.