7 Creative & Useful Ways to Use Baskets

Baskets can be one of the most useful and stylish storage pieces that you can use throughout your home. They are versatile and functional items that can work in practically every room of your home. Whether you prefer baskets or bins, we have seven ideas that can transform the way you currently view storage in your home. 

Seven Creative + Useful Ways to Use Baskets

  1. Guest Bedroom Necessities.  

Creating the perfect oasis for your guests begins by establishing a stress-free, relaxing environment for them to enjoy. Let your guest’s minds go to ease in the guest bedroom by having a place for everything. Supply baskets and bins for them to put their belongings and store guest room essentials inside of the baskets. To help their stay feel like a vacation, you can place a soap, razor, towel, lotion, toothbrush, and loofa inside of a basket for them to enjoy. 

  1. Living Room Essentials

Living rooms tend to be an open space where everything is out in the open. To help transform the current organization system in your living room, you can use baskets. Decorative baskets are perfect for storing bulky, unattractive electronics. Plus, they give you easy access whenever you need to pull out something. 
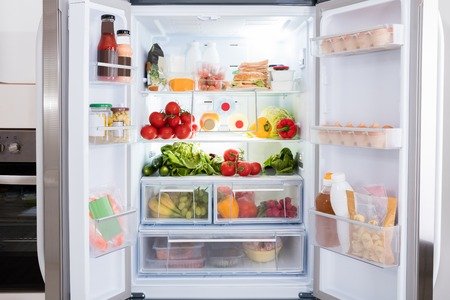
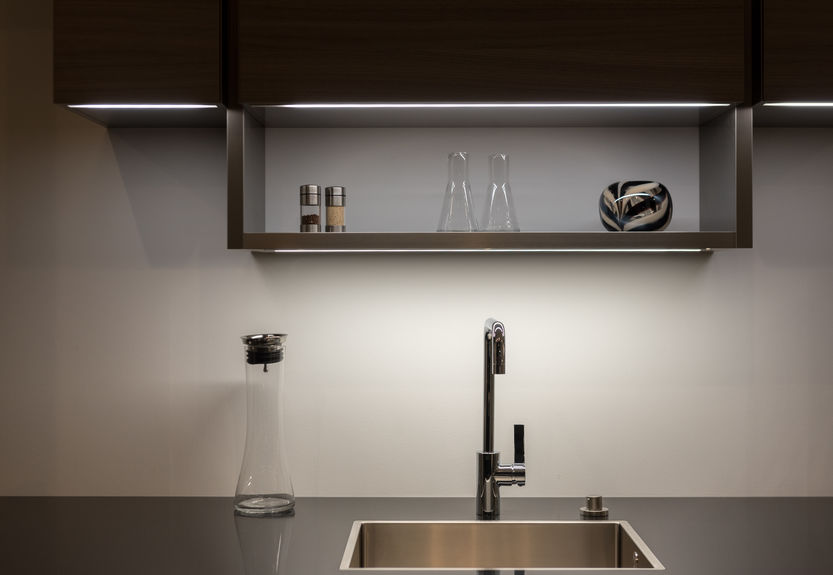
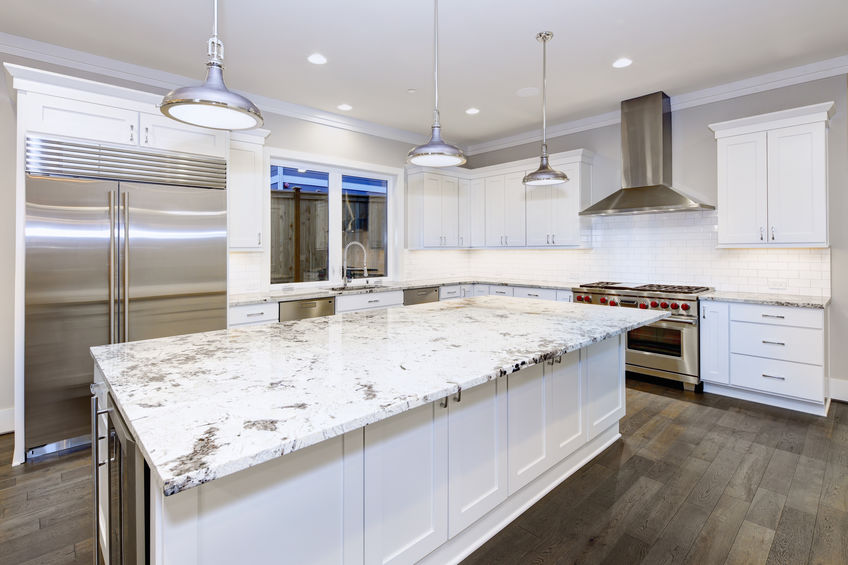
  1. Kitchen Possibilities

Reimagine your kitchen by using baskets and bins to organize your counter space, cabinets, and pantry. Home decor stores sell decorative bins and canisters to hold all of your items in a stylish way. This way you can display your condiments on the counter without worrying about them being an eye-sore. Finish off your pantry with baskets and bins to store and organize all of your food goods. Believe us, searching for an item will never be so easy with this solution! Simply print labels to place on the face of the basket for ease-of-use. 

  1. Child’s Bedroom Maximized

Are you constantly stepping on your children’s toys? Save your feet and time by organizing all of their items inside of playful baskets. Whether your child loves princesses or dinosaurs, there is a themed basket for that! You can instantly make clean-up time fun again with these decorative baskets. 

  1. Manageable Craft Room

Crafting can be a great hobby for homeowners who just need a break from their stressful life. Do not let the busyness of everyday life affect your craft room’s potential. Stash your items in organizational bins and baskets for an organized, functional craft room. 
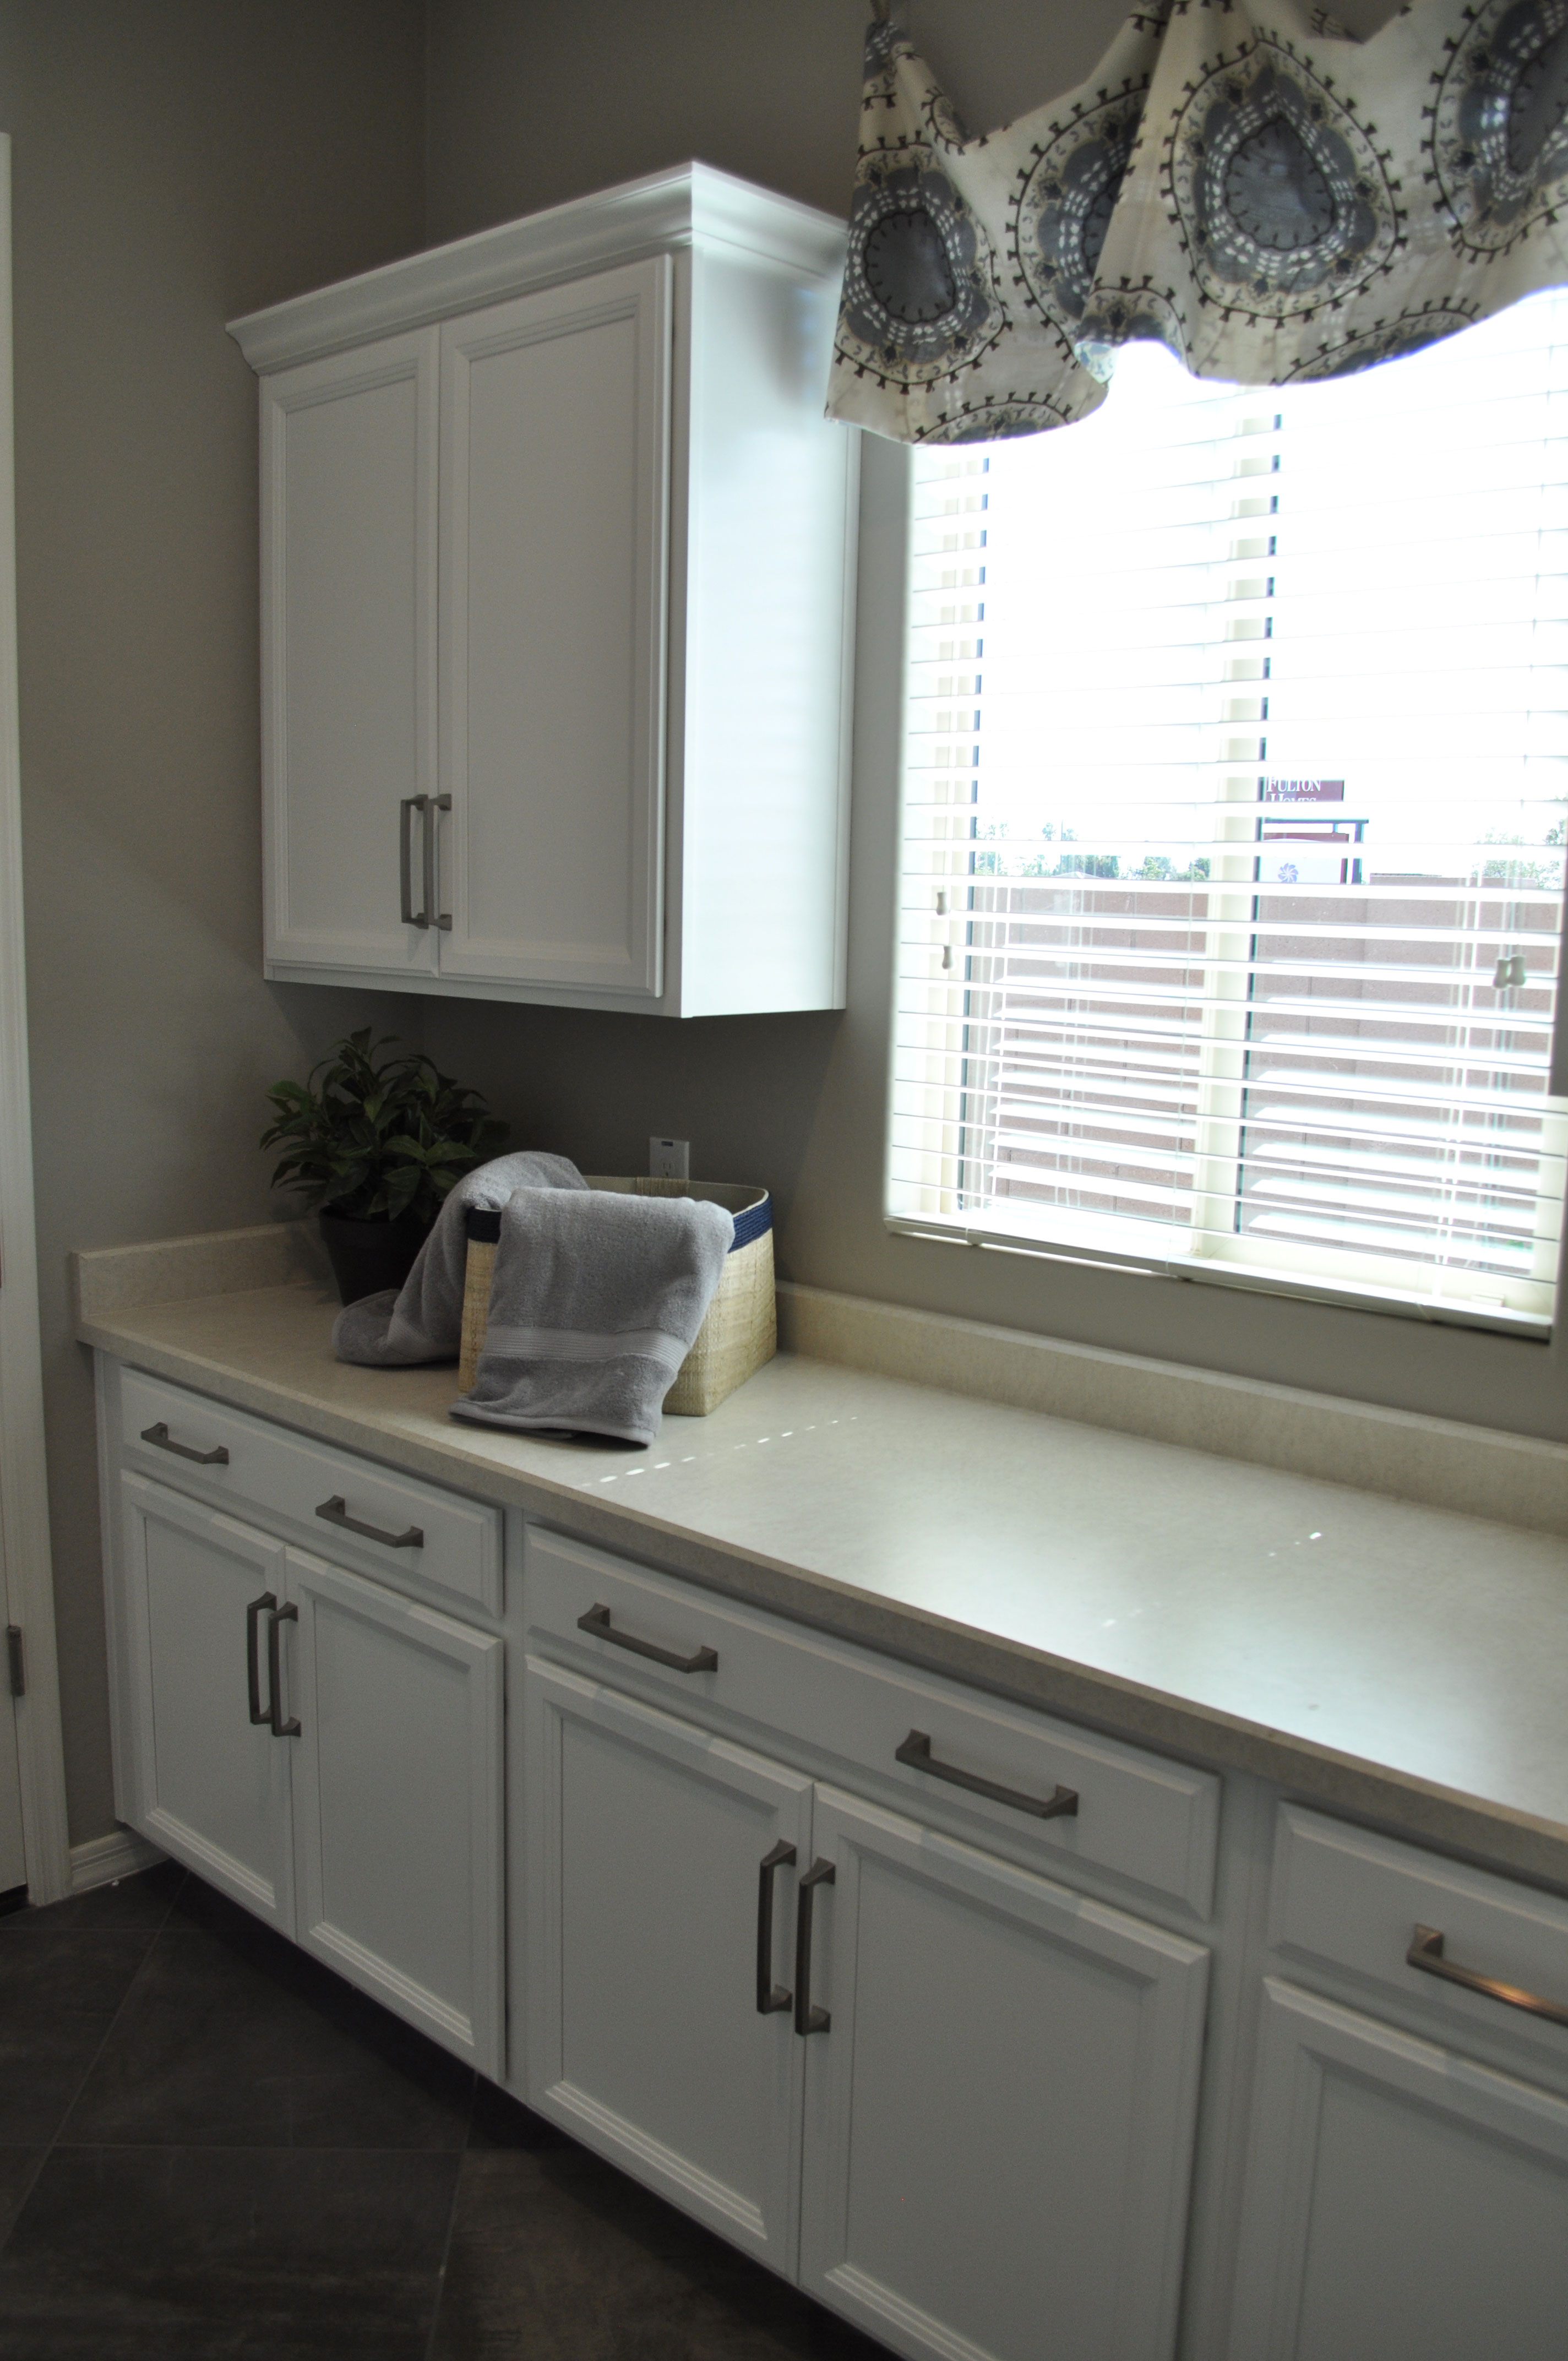
  1. Laundry Solutions

No one loves dirty laundry and organizing it does not sound very fun. But with baskets and bins to help you sort, you can rethink the way you currently do laundry. Purchase a basket or bin for each load of wash. Then the next time you go to do laundry, you sort the items in the basket based off of their wash requirements. For example, you can have a basket labeled “Colors” or “Whites.” This will help save you time and minimize on extra loads.

  1. Systemized Mudroom

Keep your mudroom clean this winter with baskets to store shoes, coats, and winter gear. You can either make a basket per item or per family member depending on your preference. 

We hope you enjoyed these tips for staying organized with baskets! The organization does not start there. You can use baskets and bins in nearly every room of your home. Let your creativity take over and create a beautiful organization system to match your home’s decor. 

Have You Organized Your Refrigerator?

Still have last month leftovers stocked on your refrigerator shelves? The refrigerator should be cleaned out and sanitized frequently for health reasons. If you’re ready to take on the daunting task of organizing and cleaning your refrigerator, we’re going to show you how you can do so effectively. It’s time to throw out expired condiments, old food and clean the gunk from the corners.

How To Clean Out the Refrigerator

Perhaps the easiest way to clean out the fridge is to empty out the contents. You can do this section by section, or all at once. Setting everything outside the refrigerator allows you to determine what needs to be thrown away and what food items can be kept. Of course items that need to be discarded should be thrown in a trash bag, while the others can be kept to the side so that you can load them back into the fridge.

More than likely, the interior of the fridge is less than pristine. Before you load the contents back in you should take a wet, soapy cloth and wipe off the crumbs and food remnants that are stuck on the shelves. For areas with gunk that’s tough to remove you can use a solution of vinegar of water. Make sure you dry wipe the fridge dry. Don’t forget the drawers and the fridge doors.

Arrange The Refrigerator Like A Professional

When loading the refrigerator back after thoroughly cleaning it you should organize it like the professionals do. Restaurants organize their refrigerators based on food safety. Professional kitchens organize food in the fridge based on the temperature it requires to be cooked. Prepared foods and leftovers that don’t require a high cooking temperature are usually stored on the top shelf in the fridge. Chicken, uncooked meats, and other raw foods are placed on the bottom shelf. When foods are organized this way you won’t have to worry about cross-contamination.

Here’s a guide you can follow for loading the refrigerator:


Door
– The door is the warmest section of the refrigerator. Therefore, you should store condiments in this area.
Drawers – The drawers are meant to hold produce which is your fruits and vegetables.
Upper Shelves – The upper shelves should be used to store ready-made foods like yogurt, cheese, leftovers, and drinks.
Lower shelves – Raw foods

Thanks for reading and hopefully this helps you with the task of cleaning out your refrigerator, and makes it a little easier!

How to Declutter Your Countertops

The kitchen is the heart of the home. When designed correctly, it can also be one of the most beautiful areas in your house as well. From elegant flooring options, backsplashes, kitchen appliances, lighting, countertops, and more, this area is easily one of the most customizable rooms a home has to offer. This reason is why it is essential to make sure you keep your kitchen looking spic and span. However, kitchens are used every day, so our countertops can easily become home to many miscellaneous items or even kitchen goods. And this clutter can easily take from the room’s aesthetics and beautiful countertops. To help, here is a checklist for everything that should be on or off your countertops:

Is It Kitchen Essential?

The first question to ask yourself is, “is it a kitchen essential?” Our kitchens are facilitated daily, and this factor can lead to many items accumulating in them. Small things like mail on the counter, backpacks, schoolwork, or even books can slowly start collecting overtime on your kitchen counters. So try to find places for everything in your home. Perhaps you need to create a new spot to store your keys or a place to put your mail when you get it. These are great habits to prevent kitchen clutter.

How Often Do You Use It?

Next, how often do you use items on your counters? Maybe you use a coffee maker daily. Then this is an excellent utensil to sit on display; however, having a food processor or mixer our on display may not be in your best interest. This comes down to personal use. If you use things daily, they deserve a spot on your countertop. The other utensils and appliances need to be stowed away in a safe place, however.

Can It Be Stored Safely?

Next, can it be stored safely? A butcher block with kitchen knives will not stow away correctly in a pull out drawer. Or perhaps you have a Keurig which holds water and cannot be turned on its side. Make sure you consider if stowing away appliances is the correct and safe way to go about it. Maybe you use a toaster daily for breakfast. If it is still hot, then you cannot put it into a cabinet or drawer. Consider safety first and foremost.

Is It Aesthetically Pleasing?

Your countertops have a coffee maker, a griddle, and a toaster oven. Maybe your accent color in your kitchen is bright red. Every one of your appliances is bright red, but your coffee maker is turquoise. This color may come across out of place. While it may not be right to hide the coffee maker, perhaps you can create a way to store it on your countertop in a more aesthetic manner. Be creative!

Is It Hurting Functionality of the Room?

Lastly, we do not have unlimited countertop space. Be honest and consider if appliances on your countertops are taking away from the kitchen’s functionality. If your counters are too clutter, you need to make some changes. This factor needs to be considered unbiasedly and can be challenging. However, when you put functionality first, your kitchen will feel even more welcoming and inviting.

Your countertops can be a focal point of your entire design. Allow them to shine by keeping your countertops clutter-free. Remember, sometimes less can be more. While minimalism does not happen overnight, it can be facilitated daily to keep your home beautiful.

How to Maintain a Fresh & Clean Fridge

The refrigerator is most likely the most-used appliance in your home. It is running twenty-four hours a day and continuously has items taken from it or placed in it. Inevitably, items get spilled, and things are forgotten and left to spoil or rot. Soon your fridge begins to smell and, even worse, work less efficiently. While the colder environment slows the growth of bacteria, it can still grow and spread to other items in your fridge, causing them to spoil at a faster rate. That is why it is essential to keep your refrigerator clean to ensure that what you eat stays fresh, and you remain healthy.

Cleaning

In order to maintain a fresh refrigerator, you should be cleaning it as needed, whether that be daily, weekly, or entirely at least once a year. You will likely open your fridge at least once a day when you do take a quick scan of your items and make sure nothing is past its expiration. If you spill anything in the refrigerator, simply wipe it up right away to keep it from spoiling. Also, make sure that the items you put into the fridge are clean and free of drips and leaks.

On a weekly basis, take a full inventory of everything in your refrigerator, throwing out anything that has gone bad and prioritizing older items. Wipe down the outside of the doors weekly as well by using soap and water and pay special attention to the door handles. The exterior of your refrigerator is constantly being touched and can become home to a lot of germs. Cleaning it can help prevent colds and other illnesses from spreading throughout your household.

It is good to give your entire fridge a thorough deep cleaning once a year. Completely empty out the fridge of any and all items and unplug it, allowing it to reach room temperature before cleaning it. Remove all of the shelves and drawers; it is much easier to wash them separately from the fridge. Scrub down your entire fridge with soap and water, as well as the shelves and doors. This is also an excellent opportunity to clean your door seals. Over time crumbs and dirt collect in the door seals and lessen their efficiency. Cleaning them can help your fridge stay cooler and ensure items remain fresh as long as possible. Lastly, make sure everything is dry before putting your fridge back together, returning any items, and turning it on to the normal setting.

Tips for Maintaining a Clean Fridge

  • Make sure that items are clean before putting them in the fridge.
  • Place items that are defrosting on a plate to keep liquid from spreading.
  • Ensure leftovers are packed in sealed containers. 
  • Keep a box of baking soda in the fridge to keep it smelling fresh. 
  • Coffee grounds, activated charcoal, or cat litter can be spread on a tray and placed in the fridge for a while to neutralize more stubborn odors.

The fridge stores your food and drink, so it is vital to keep it clean in order to keep you healthy. The easiest way to ensure your fridge stays clean is to keep the stuff you put in the refrigerator clean and properly sealed. Maintaining a clean and odor-free fridge is simple as long as you keep up with it. If you have any additional tips, feel free to leave them below in the comment section, we would love to hear from you!

Smart Packing Tips: Don’t Move What You Don’t Want

closet-clutter-monster-1412702This is the hardest part of moving, but it really pays: discard everything you can before you start packing. Here are some suggestions on how to approach this.

Take a room-by-room approach: Go through each room and get rid of the obvious things. Is it time to recognize that you will never use that mini-trampoline? Then let it sit in someone else’s garage. Be brutal. Call Goodwill or your favorite charity and get that stuff out of your house. It will give you more room for your packing process and boxes.

Don’t pack anything that you won’t look forward to unpacking in your new home: Can’t see that gift from Aunt Betty in your new family room? Let it go. There may be things that you have been living with so long that you no longer see them. Packing them up is a good opportunity to give them a second look.

Marie Kondo in her book, The Life-Changing Magic of Tidying Up: The Japanese Art of Decluttering and Organizing, talks about holding things in your hand to see if they give you joy and letting go of anything that doesn’t. This is actually a smart approach. Are their kitchen utensils, cleaning tools, or other household items that you have held onto but never use? Maybe now is the time to discard them rather than bring them to your new house to never use them there.

Help your spouse and children to go through this process too: Whether it’s clothes or toys, talk about letting go of those things that you no longer use, need or want. That way you can all start fresh in your new home, and only bring those items that you truly value and want to take with you.

Smart Packing Tips: Organizing the Packing Process

file0001135644184
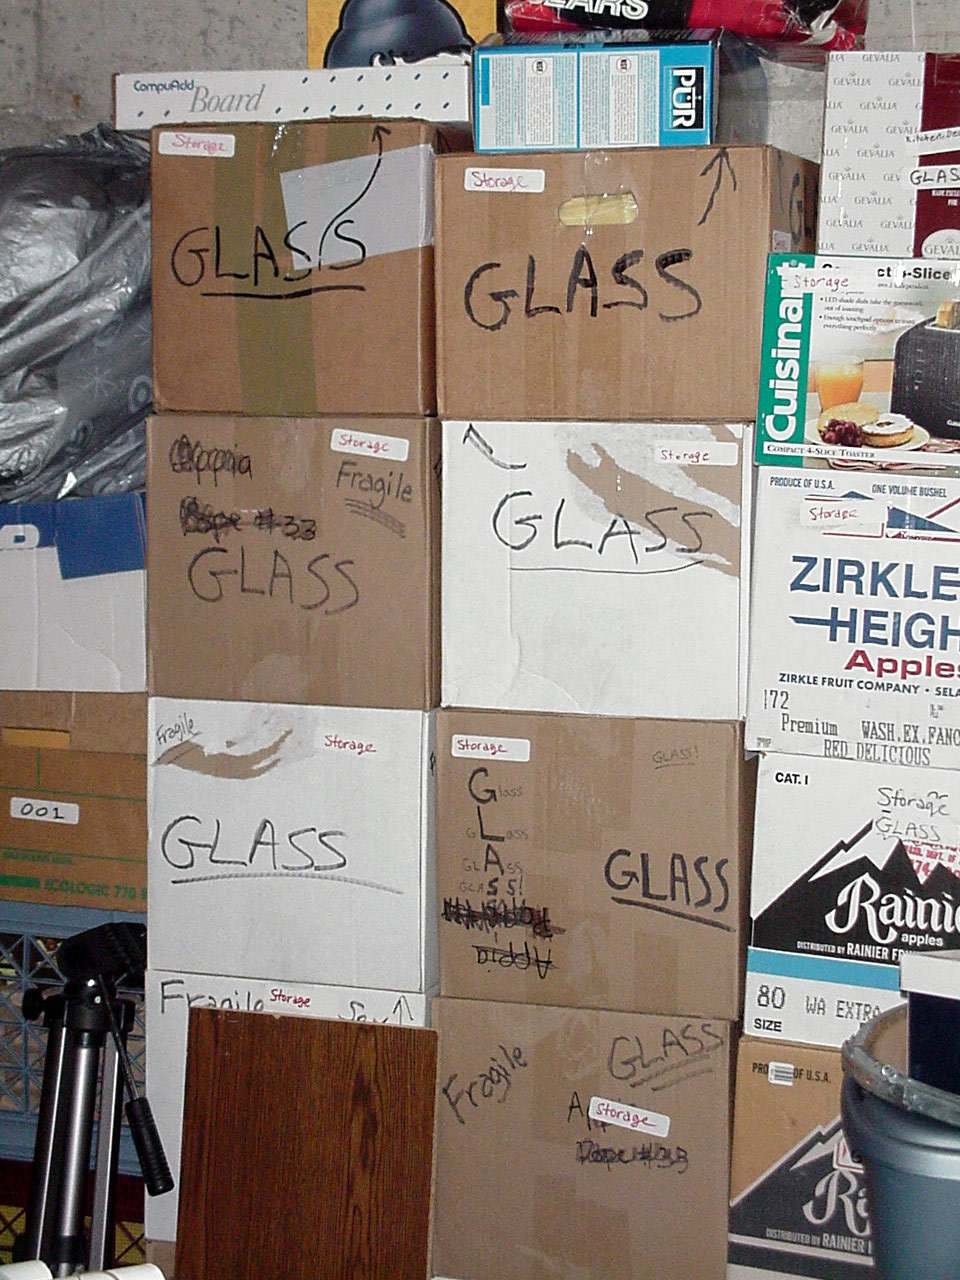
Moving into a new home is exciting but packing and unpacking – not so much. But if you approach the process in a smart way you will save yourself a lot of headaches and frustrations. This series of blogs will help you make a smooth transition from your current home to your new one.

To begin with, you don’t want to have a pile of boxes looking like this when it’s time to move. Yes. it’s nice to know what’s fragile, but what exactly is in each of those boxes and where do they go? Before you pack your first box, you need to create a system. And that system should be based on the place you’re moving to, not where you’re moving from.

Develop a three-letter code for every room in your new home: It could be KIT for kitchen BD1 for the master bedroom, BA1 for the master bathroom, FAM for the family room, and so on for every room in the house. Buy three or four wide black magic markers and plan to mark each box on the top and all four sides. That way stacking doesn’t block the room location. Also buy a large red marker to mark all fragile boxes. Place those in a special location separate from the other boxes.

Determine the level of organization you can handle: Some people are organized enough to number and list their boxes with key contents. Don’t be hard on yourself if this is too much structure for you. However, do mark those boxes you will need to unpack first. This may include dishes and silverware, key kitchen utensils, your childrens’ favorite toys, and bedding and towels.

Pack like things together: It’s easy to get harried at the last minute and mix bedroom, bathroom and kitchen stuff in the same box. But when it is time to unpack this ends up leading to a lot of unnecessary work. It’s better to leave some boxes not quite full than to waste time shuffling things all around the house when you unpack.

In our next blog, we’ll talk about what you need to do before you actually start packing.

Create a Handy Gift-Wrap Center

Warner-Groves-at-Morrison-Ranchwrap-room-web
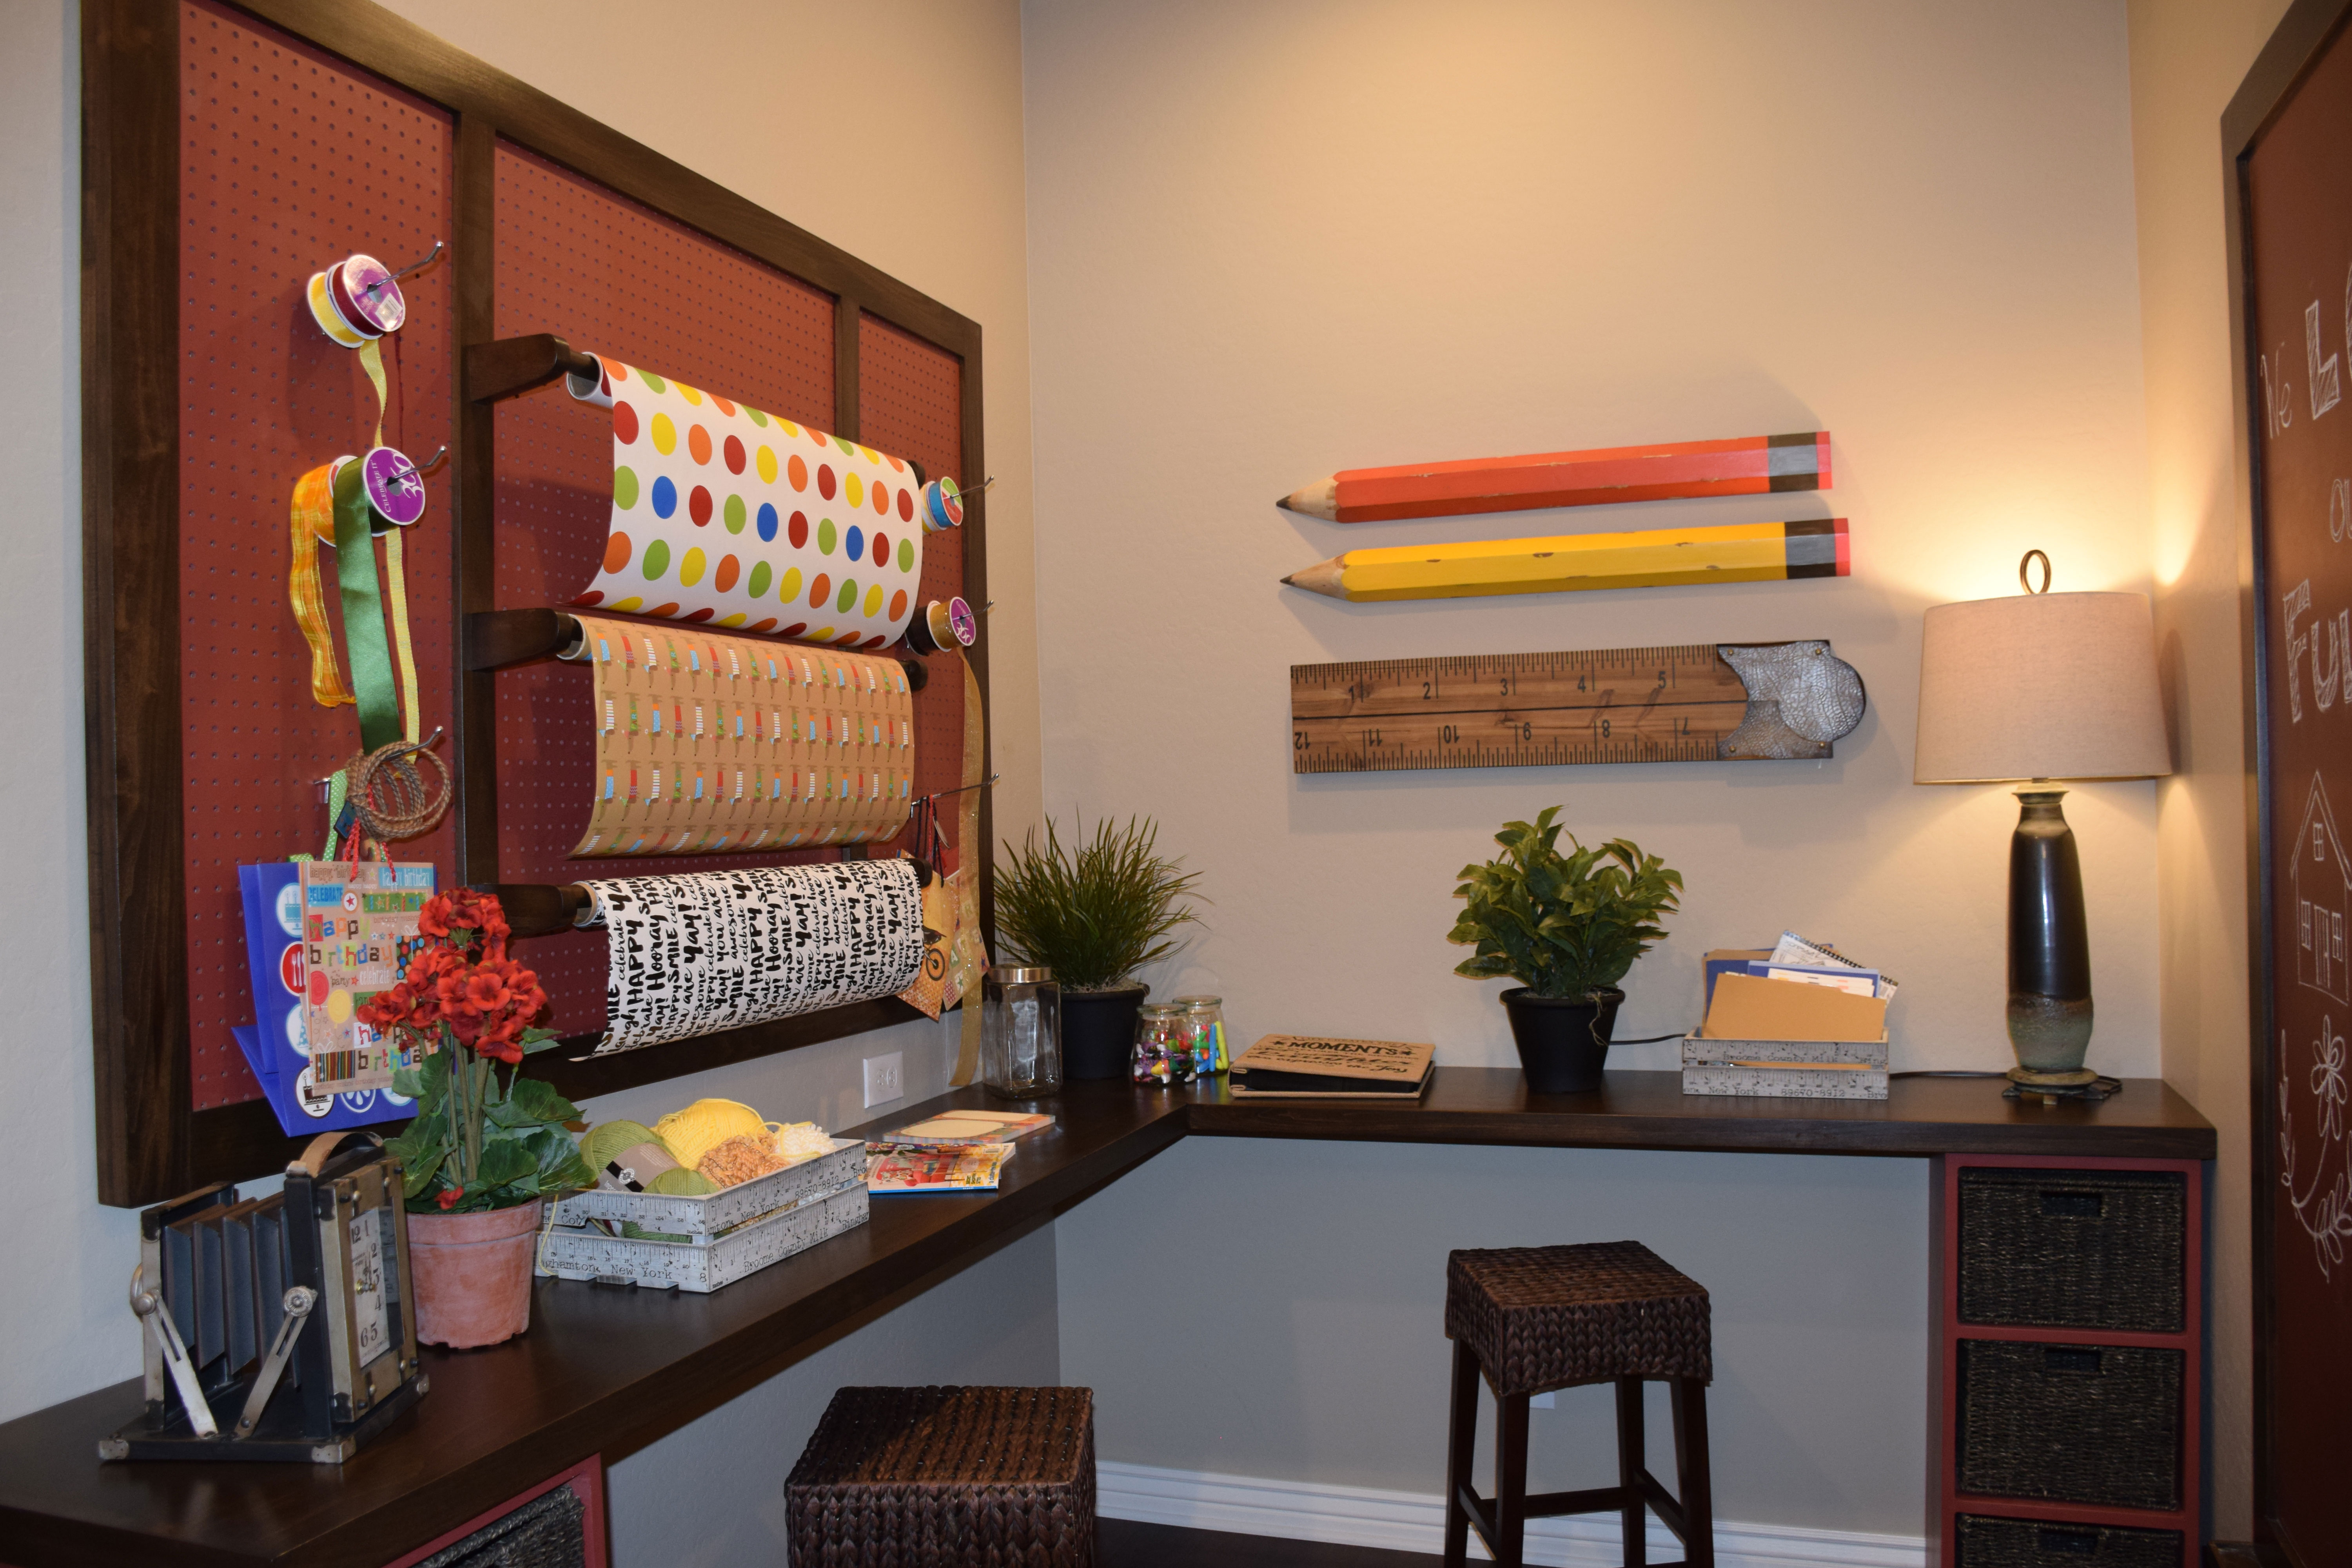
Are you wondering what to do with that extra wall in your laundry room, garage or den? Here’s a great idea that is as useful as it is decorative: create a gift-wrap center. Start by installing several large peg boards. This display, visible at the Fulton Home models in Warner Groves at Morrison Ranch, used some nice wood to frame them, making the boards look finished. You can prime and paint the peg boards to match the colors in the room.

To hang the wrapping paper, you can use closet or curtain rods, set at the right width. These rods are mounted on the wood frames, making them as easy to hang as they would be on any wall. In this room, they chose to hang three rods, but you could easily fit six or even seven rods, giving you a nice choice of wrapping paper. Hooks set into the peg board on either side of the paper hold ribbon and bags.

You could put your scissors and tape in a container on the counter and store tissue paper and other package materials in drawers or baskets under the counter. This is also a great room for storing note paper, greeting cards and address lists.

When special holidays roll around, simply change out the every occasion paper for suitable gift wrap and you have your wrapping station ready. Tune your radio or iPad to holiday carols to put you in the mood and you’re all set!

Make the Most of your Laundry Room Storage

From the Rancho Mirage model in Oasis at Queen Creek.

From the Rancho Mirage model in Oasis at Queen Creek.

It’s easy to let your laundry room become a catch-all for those things you can’t figure out where to put. Holiday decorations, extra hangers, cleaning supplies and other odds and ends find their way into your laundry room cupboards and before you know it they’re full. Instead of this kind of unintentional use, how about turning your laundry room into a resource for specific types of storage? Here are a few suggestions.

Entertainment Central: Vases and other elements for table centerpieces and buffet decorations could find a convenient place in one or more laundry room cabinets. Add a frog, some pebbles or marbles for helping to stabilize flower arrangements and you’re ready for flower arranging or creating an interesting base for a buffet arrangement. You might add some of your favorite serving pieces and table linens for one-stop-shopping before a party.

Clothes Management: Pins, scissors and your sewing kit can be kept in the laundry room when you need to sew a button on tighter or stitch up a hem that’s coming loose. Stain removers, wrinkle release spray and even fusible sewing tape for any quick fixes can really come in handy when that jacket and skirt that you really wanted to wear needs mending.

Roadtrip Supplies: Cool bags, paper plates, disposable silverware, condiments in little packets, favorite road games and activities can be organized in one place ready to grab when you decide to take a weekend trip. Don’t forget a map or two for the kids to use to follow along where you’re going – reducing although not eliminating the cries of “are we there yet!”

Gift Wrap Center: Wrapping paper, ribbon, tape, scissors and a nice collection of gift cards help you be ready for those last-minute gift needs. Instead of searching through the house for everything you need, keep a special set of supplies in one cabinet just for gifts.

These are four quick ideas for ways to make the most of the storage in your laundry room. What other ideas can you come up with to make your laundry room useful for more than laundry?

Attack Closet Clutter

closet_montage_Ironwood-webAre you finding it hard to keep even the most generous closet you’ve ever had under control? Even if your master closet is as spacious as this one from Ironwood Crossing, it may be time for a serious attack on your clothes clutter. Let’s take this step-by-step so you can take back your closet and stop going crazy every time you step into it.

Step 1: Empty your closet. This may seem foolish, overwhelming, or unnecessary, but you need to start this way to truly make a difference. There are several reasons for this. One is you may find that once your closet is empty, it could do with a cleaning. Clothes can hide a multitude of sins. Vacuum the floor and wipe down the shelves and clothes poles. You’ll start feeling better immediately. Pile your clothes on the bed and put shoes, purses and anything else you find in there on the floor.

Step 2: Remove anything that doesn’t belong in your closet from the room. Did you discover where you hid that birthday present for your daughter that you couldn’t find when you wanted to? Maybe your closet has become a catch-all for books, papers or other items you wanted to stash quickly before company came. Whatever it is, if you don’t want it in your finished closet, get it out of the bedroom.

Step 3: Take each clothing item and honestly decide whether it belongs in your wardrobe. You’ll hear people say that if you haven’t worn something in a year, then it should go. Instead, take a look and decide if you feel attractive and comfortable in it. If the answer is yes, it stays. No and it goes. Try on any clothes or shoes you’re not sure about and take the time to look in the mirror. Would you buy each item again if you saw it in the store? If the answer is no, get rid of it. Check the look of purses, scarves or other accessories. Let go of items that are worn, out of style, or that you’re simply tired of wearing.

Step 4: Create a plan before rehanging your clothes. Do you like to have work clothes in one section and weekend clothes in another? Maybe you want to sort by color or type of fabric. Have you been hanging clothes that would do better folded in a drawer? Figure it out and replace accordingly.

Step 5: Use bins and baskets to sort shelves. Keeping smaller things contained by category will make it easier to stay organized. Shop your own home for likely boxes and other containers before rushing off to the store. You may find some solutions that work well and add a decorative touch to your closet.

Step 6: Add some hooks to the door or a free wall. These can be used for clothes you’ve worn once but that aren’t yet ready for laundering. They’re also handy for scarves and belts. Hooks can help you keep everything off the floor, which makes a closet feel more spacious and workable.

Step 7: Pack up the give-away clothes and get them out of the house immediately. Otherwise you may be tempted to dive in and rescue some items later. Don’t let that happen.

Step 8: Step back and admire your handiwork! This has been quite a job but you now have a closet filled with clothes you love. Be sure to reward yourself for your hard work – maybe by going shopping???

Spring Cleaning

spring-cleaning-webWith temperatures in the 90’s only a few weeks ago, most Arizona residents know that summer’s heat is just around the corner. This makes Spring cleaning extra important, since now is the best time to open all the doors and windows and sweep everything left over from Winter away to gear up for Summer.

This is a great time to open all your closets and cupboards and gather old clothes, kitchen utensils and other unneeded things that have accumulated over the past year and donate them, sell them or throw them out.

Start by creating a list of goals. Do you want to make-over your master bedroom with new colors and less clutter? Maybe you would like to get rid of all the junk food hiding in your kitchen as the start to a new healthier eating plan. Or it could be time to wander through some of the toys and DVD’s that your children are too old to enjoy anymore. Remember that others can benefit from items that you no longer need.

Next, set aside time to meet your Spring-cleaning goals. Do you work better with a large block of time? Then choose a free Saturday to tackle your list. See if you can get help from your family or trade time with a friend so you can work on each home and chat while you clean and organize.

Finally, dive in. And be sure to plan a special reward when your list is finished. It might be dinner out or a bouquet of fresh flowers to set off your newly-tidy dining room. Or maybe just the promise of a Sunday afternoon with nothing to do but relax. With just a bit of planning and some serious effort, you can refresh your home this Spring and prepare for Summer. And above all, have fun with the process!